How to make Solar Charger for Nokia (9210i) ?
Solar Charger:Some initial tests with the solar panel:
 As it turned out. The resistor was just a hindrance. The output of one panel is so low it can hardly light up that led with the resistor. It was way too weak to charge anything.
Well anyway. To the point. Here's the parts you will need:
* Panasonic Solar Panel BP-376634 - x4
* Diode 1N4448 - x4
* 10 uF Electrolytic capacitor - x3
* Connector which fits your phone
* Epoxy
* Some wire
* Piece of cloth
The solar panels seem like nice ones for this hack. They are rated at 5.5V, 33mA at optimal conditions.
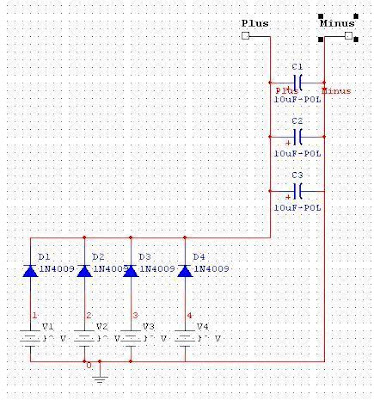
Diodes prevent back flow from the connector, and from other solar panels that are substantially less lit than others.
Capacitors are supposed to take the edge out of the blow when you connect the charger to the phone and there is a lapse of voltage because sudden increase of current. Dunno if this really works but that is what I figured out. Works at least in Multi Sim :)
Here is the diagram of the thingy:
 I made this picture hastily so there are wrong codes on the diodes. Use the listed 1N4448 instead.
Lets solder everything up:

 Notice, that in this picture, there is an extra diode at the output. I initially figured it was smart thing to prevent back flow from battery to capacitors. Then again. Fuck it. There's no room for any waste of current in this design so I tossed it after making some tests (again). This is also why there is no regulator in the circuit. The resistor there is not welcome.
With and without the final diode:
 Anyone care to tell me why is this so? The diode isn't supposed to _eat_ the trigger voltage...
(Btw, how do you like my multimeter? I inherited it from my grandfather. He used to be a Sony sales&service guy few decades back :))
Well anyway. This is how it looks now:
 Make a note of how the wires are pulled. There is one free gap between panels on purpose. It will be important later on. We want to be able to fold up the thing like a map :)
Test-Charging Communicator:
 I was a bit hesitant to test, but this was the only phone available with enough drained battery to charge with this puny thing. Works fine :) Onwards!
So, now we want to package the thing nicely so it wont spill its guts on the road.
Supplies we need:
 Roll up some tape around the capacitors and the end of the panel:
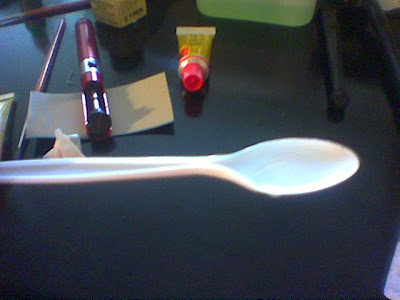
 Mix some epoxy in some discard able container,such as plastic spoon here.
 Pour the epoxy in to our crude mould.
 At this point I forgot to take pictures again. Just using pieces of tape as a mould, cast all metal parts into epoxy. This prevents any corrosion and also prevents you from yanking the wires out of your crappy soldering contacts :P
Finally, lay down a thin layer of epoxy and attach the piece of cloth to it. If you are using non- stretching cloth, cut the one side between panels open which you left open earlier on. This makes it easier to fold the thing.
Here's How it turned out:

 This how you fold it:

 Viola! ! !
 Notes:
* Nokia 9210i
- Li-ion
- 3.7 V
- 1300 mAh
- Successfully charged even when all the battery indicators were already lit up.
* Nokia 3650
- Li-ion
- 3.7 V
- 850 mAh
- Acknowledges presence of charger but apparently decides it is already more charged than my solar panel could provide. Curious...
* Nokia 6600
- Li-ion
- 3.7 V
- 850 mAh
- Not surprisingly, does the same thing as 3650. I'll try to let these drain.
* Nokia 6310
- Li-polymer
- ? V
- 1100 mAh
- Will test later.
It seems to me I under-estimated the voltage need of the phones. They are 3.7 V. I get 4.2 V out of panels under quite bright lamp. Then there is probably a heap of electronics to prevent destroying a phone with mis-matched charger. 9210 is the oldest model of these phones, so it prolly has more simple design than the others.
Please tell me if you are able (or unable) to charge some phone with this design. You can reach me by mail at: arifin.pasha@yahoo.com
Ho hum... You know.... Solar cells are fragile.


0 comments:
Post a Comment